Follow Me On Social Media!


Simple Sourdough Bread Starter: Easy Steps for Artisan Flavor
Introduction to Simple Sourdough Bread Starter
Baking has a unique charm, especially when you venture into making your own simple sourdough bread starter. The adventure begins with just a few simple ingredients that together create a living entity in your kitchen. Imagine waking up to the scent of freshly baked bread and knowing you were the one to make it—that’s the magic of sourdough!
The joy of baking bread at home
There’s something incredibly rewarding about baking bread from scratch, particularly sourdough. Unlike conventional bread that relies on commercial yeast, sourdough harnesses the natural yeasts present in the air, creating a complex flavor profile and a beautiful crust. If you’ve ever had a slice of crusty sourdough, you know what I mean; it’s airy on the inside, with a crispy exterior that’s simply divine.
But let’s not kid ourselves—starting your own simple sourdough bread starter might feel a bit daunting at first. The truth is, creating and maintaining a sourdough starter is one of the simplest and most gratifying baking processes. It begins by combining equal parts flour and water and allowing it to ferment over a few days. Just think of it as nurturing your own little kitchen pet; feed it, watch it grow, and, ultimately, reward yourself with some amazing bread.
Have you ever wondered why sourdough has such a rich history? It dates back thousands of years and was the bread of choice for civilizations across the globe. It’s a testament to human ingenuity and resourcefulness—the ability to create something so delicious from simple, humble ingredients.
With a little patience and care, your simple sourdough bread starter will become your trusted baking companion. By the time you’re ready to bake your first loaf, you’ll not only have developed a starter but also a deeper appreciation for the art of bread-making. So roll up your sleeves and let’s get started on this journey of flavorful exploration!
Key Ingredients for Simple Sourdough Bread Starter
Starting on your journey to create a simple sourdough bread starter is truly exciting! It paves the way for baking some delightfully crusty bread right in your kitchen. Here’s what you’ll need to get going.
Flour: I prefer using a blend of all-purpose and whole wheat flour for my starter. This combination not only builds a robust flavor but also provides the essential nutrients that yeast and bacteria love. If you’re feeling adventurous, you can try other flours like rye for a unique twist!
Water: Fresh, filtered water is key for your starter. Chlorinated tap water can inhibit yeast growth, so it’s best to let it sit out overnight or use bottled water. The goal is to create a welcoming environment for your new microbial buddies.
Time: Although not a physical ingredient, patience is essential. Allowing your starter to ferment naturally takes time and observation, but trust me, the results are worth it as you watch it bubble and grow!
Gather these ingredients, and you’ll be well on your way to creating a lively simple sourdough bread starter!
Why You’ll Love This Simple Sourdough Bread Starter
Creating your own simple sourdough bread starter is not just a cooking task; it’s an art form that connects you to centuries of baking tradition. The process of nurturing and growing your starter can feel like tending to a pet—it requires care, attention, and a little bit of love.
The perfect homemade bread experience
Picture this: the aroma of freshly baked sourdough wafting through your kitchen, the satisfying crunch of the crust, and that soft, chewy texture inside. With a simple sourdough bread starter, you can achieve that perfect homemade bread experience. Not only is sourdough healthier—packed with probiotics and easier on the gut—but the flavor is unparalleled.
-
Community and Connection: Sourdough baking often brings people together. Share your starter with friends, swap tips, and even bake together!
-
Simplicity: Unlike other yeast breads that require precise measurements and instant yeast, sourdough gives you the freedom to experiment. The only ingredients are flour and water—no fussing required.
-
Satisfaction: There’s something uniquely rewarding about crafting your own bread from scratch. Watching your starter bubble and rise will fill you with a sense of accomplishment.
Whether you’re a seasoned baker or a complete novice, you’ll soon be enamored with the joy that baking sourdough bread brings into your kitchen. Dive in, and you might just find a new passion waiting for you!

Tips for Making Perfect Simple Sourdough Bread Starter
Crafting a simple sourdough bread starter isn’t just about mixing flour and water; it’s about embracing an age-old tradition that connects you with every artisan baker before you. As you embark on this delicious journey, here are some friendly tips to ensure your starter flourishes.
Techniques for Kneading and Folding
-
Gentle Touch: When handling your dough, remember that sourdough loves a gentle touch. Instead of aggressive kneading, aim for a more delicate approach. Use your fingertips to incorporate ingredients, and fold the dough over itself rather than squashing it.
-
Proper Folding Technique: After the initial mixing, perform a series of folds every 30 minutes during the first couple of hours of rise. This gentle stretching helps develop gluten without deflating the dough. Imagine you’re wrapping the dough like a gift—carefree yet precise.
-
Hydration is Key: Don’t hesitate to keep your dough slightly wetter than you think. A more hydrated dough often yields a lighter, airier bread, and it allows the starter to better absorb flavors.
-
Timing Matters: While every starter behaves differently, patience is essential. Allow your starter to rise until it has doubled in size, which may take longer than expected. The living cultures need time to work their magic!
By incorporating these techniques, your simple sourdough bread starter will not only thrive but also create the most delicious loaf you’ve ever tasted. Enjoy each step of the process!
Time Breakdown for Simple Sourdough Bread Starter
Creating your simple sourdough bread starter isn’t just about mixing flour and water; it’s an exciting journey of fermentation and flavor development. Here’s a helpful breakdown of the time involved in this rewarding process:
Preparation time
– 15 minutes is all you need to gather your ingredients and combine them to start the fermentation process.
Rise time
– Allow your starter to rise for approximately 24 hours. During this time, the wild yeast and bacteria will work their magic.
Baking time
– Once your starter is ready, baking with it usually takes around 30-40 minutes depending on your specific recipe.
Total time
– From start to finish, you’re looking at roughly 24 hours and 55 minutes before enjoying freshly baked sourdough bread. Embrace the wait; good things come to those who are patient!
Nutritional Information for Simple Sourdough Bread Starter
Creating a simple sourdough bread starter opens the door to healthier baking. This beloved mixture of flour and water not only brings rich flavors to your bread but also nurtures beneficial bacteria that contribute to its nutritional profile. Here’s a quick look at the essential nutritional information you can expect from your homemade starter.
Calories
A typical serving of a simple sourdough bread starter contains about 50 calories. This makes it a low-calorie option when compared with other bread-making components, allowing you to enjoy healthier homemade bread without the guilt.
Protein
The protein content in your sourdough starter is approximately 2 grams per serving. That’s fantastic news for those looking to boost their protein intake while enjoying delicious baked goods, as protein is vital for muscle health and overall well-being.
Sodium
When it comes to sodium, a simple sourdough bread starter offers a negligible amount, usually around 5 milligrams per serving. This low sodium level means you can create and savor your bread without worrying about excessive salt, making it a heart-healthy choice in your kitchen.
FAQs About Simple Sourdough Bread Starter
Navigating the world of sourdough can feel like an adventure. Understanding your simple sourdough bread starter is crucial for ensuring that your baking journey is successful and enjoyable. Here are some frequently asked questions about keeping that starter lively and healthy.
How do I keep my sourdough starter alive?
To maintain your simple sourdough bread starter, regular feedings are essential. Store it in a glass jar, and feed it every 24 hours if you’re keeping it at room temperature. This involves discarding half of the starter and adding equal parts flour and water. If you’re going to take a break from baking, store it in the fridge and feed it once every week. Just remember to bring it back to room temperature and feed it a couple of times before use.
Can I use whole wheat flour instead?
Absolutely! Switching to whole wheat flour can enhance the flavor and nutritional content of your simple sourdough bread starter. Whole wheat flour contains more nutrients and brings a nuttier taste to your bread. If you’re using it for the first time, you might notice your starter becomes more robust.
What’s the best way to store sourdough bread?
To keep your sourdough bread fresh, wrap it in a clean kitchen towel or store it in a bread bag. Avoid using plastic, as it can trap moisture and lead to a soggy texture. If you want to extend shelf life, consider freezing it. Slice your loaf before freezing to make it easier to toast later, ensuring you can enjoy that fresh-baked taste anytime!
Conclusion on Simple Sourdough Bread Starter
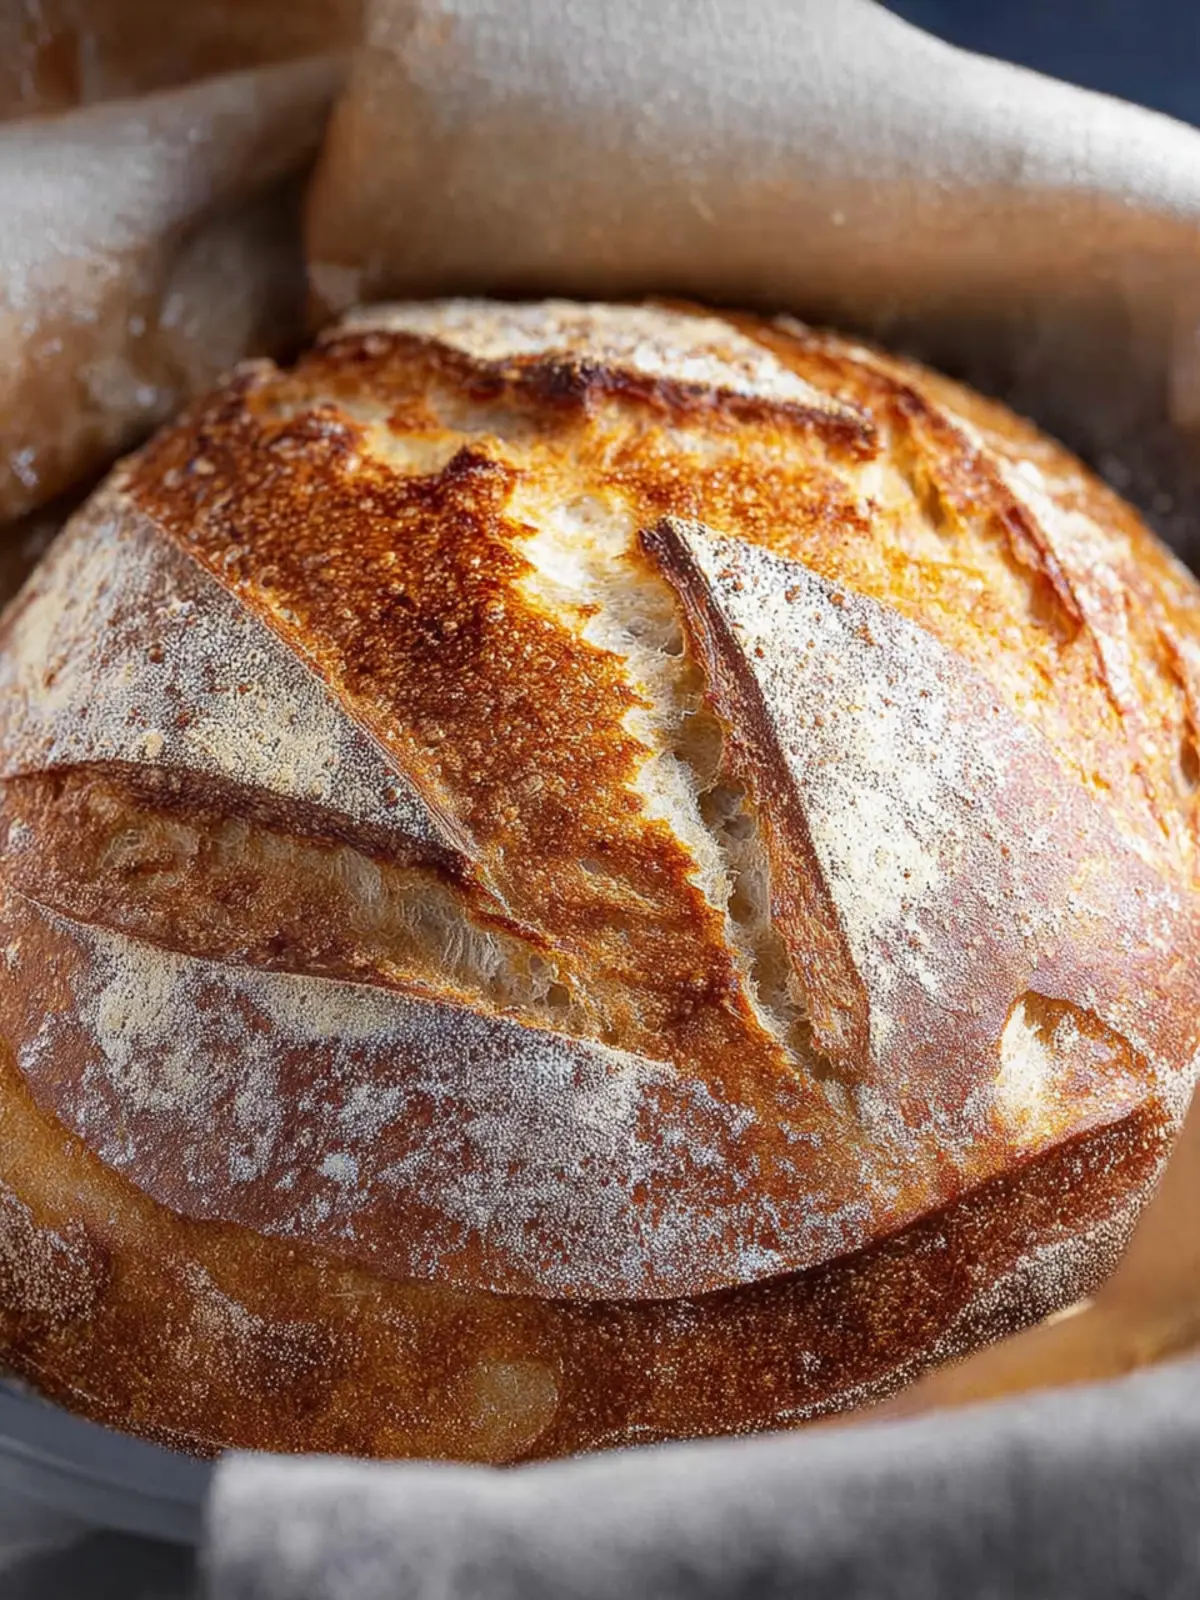
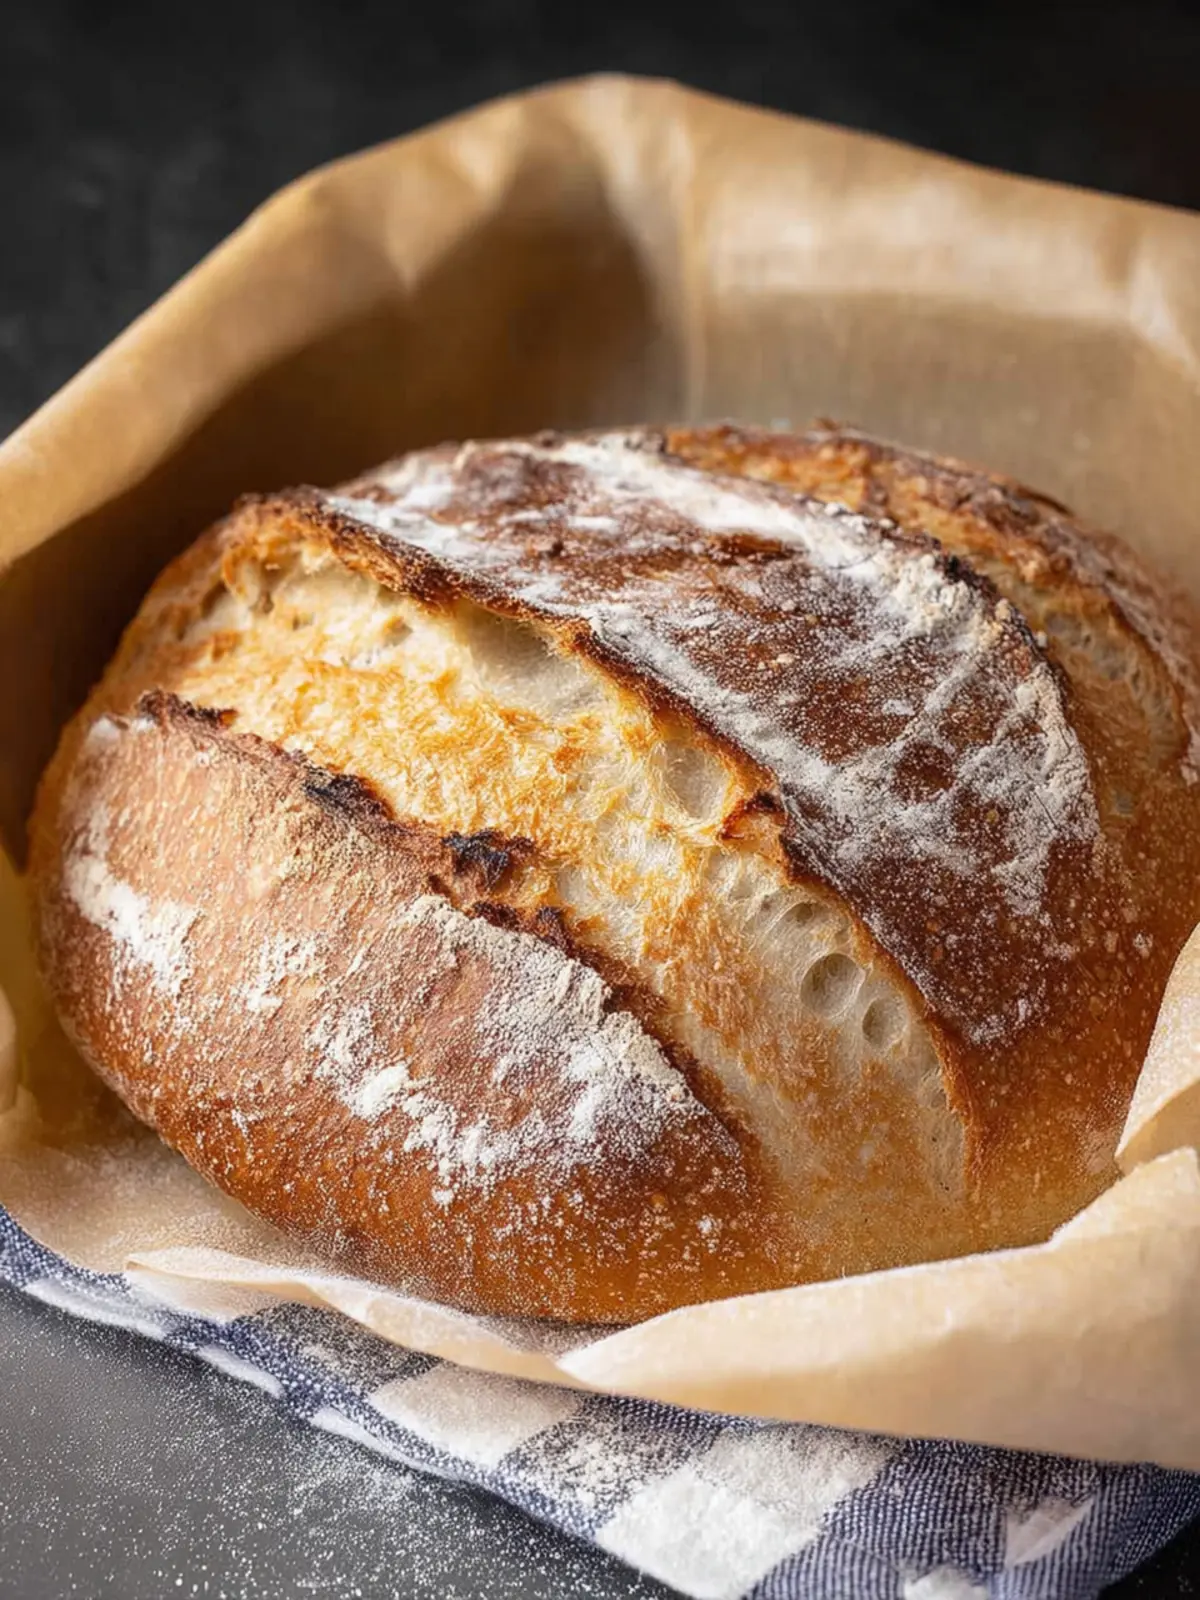
Creating your own simple sourdough bread starter opens the door to a world of baking adventures. Not only is it a rewarding process, but it connects you with the age-old tradition of bread-making. As you nurture your starter, you’ll discover the joy of watching it come to life, transforming simple ingredients into something magical. Remember, patience is key; the beauty of sourdough lies in its slow fermentation. Embrace the process, savor the aromas, and enjoy the delightful, tangy loaves that will grace your table. Your homemade bread isn’t just sustenance; it’s a delicious story told through every slice.
Print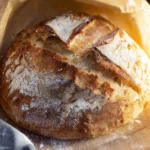
Sourdough Bread
- Total Time: 5 hours
- Yield: 1 loaf 1x
- Diet: Vegetarian
Description
A delicious homemade sourdough bread that is perfect for sandwiches or to accompany any meal.
Ingredients
Scale
- 4–5 cups all-purpose flour (I prefer unbleached)
- 1 ½ cups warm water
- ¾ cup active sourdough starter
- 1 tablespoon honey
- 1 teaspoon salt
Instructions
- Add all ingredients together in the bowl of a stand mixer with dough hook.
- Turn the mixer on 1-2 (never higher than 2 or medium-low) and let the mixer knead the dough for about 5 minutes. The dough will be sticky and doesn’t quite form a ball. (If making by hand, knead for about 10 minutes.)
- Turn off the mixer and scrape the dough into a medium bowl that has been lightly coated with oil. Cover with plastic and set aside for about 3 hours while the dough rises.
- After 3 hours, turn the dough and gently start folding up the sides. Grab the dough at the side of the bowl and lift up and towards the center of the bowl. Press down, turn the bowl 90 degrees and repeat this several times.
- Cover again and let it rise for an additional 2-3 hours. (This will depend on the temperature of your home. A warmer kitchen will need less time.)
- After the 2 hours, lightly dust your countertop with flour. Press the dough down with your fingers then start pulling up the sides and pressing into the center. You may need to add more flour as this can be a loose dough. Keep pulling up the sides and pressing into the center then flip the dough over. The top should be smooth. Dust with more flour and set the dough onto a piece of parchment paper. Score the dough with a knife.
- Place a Dutch oven (make sure you have a lid) into a cold oven and heat to 450°F. Once heated, carefully remove the hot Dutch oven from the oven. Remove the lid and set it somewhere heat resistant. (I set the lid on my stove.) Pick up the parchment paper with both hands and place inside the Dutch oven. Carefully replace the lid.
- Place into 450°F oven and bake for 15 minutes.
- After 15 minutes, carefully remove the lid and bake an additional 10-15 minutes, or until the top is nicely golden brown (don’t worry if it is darker brown, you just don’t want it burnt) and when you tap on the top the bread sounds hollow.
- Remove from oven and set Dutch oven to the side and leave the bread alone for about 15-20 minutes.
Notes
- Make sure to use unbleached flour for the best results.
- The dough may need more flour if it feels too sticky.
- Monitoring the temperature of your home can help dictate the rise time.
- Prep Time: 15 minutes
- Cook Time: 30 minutes
- Category: Bread
- Method: Baking
- Cuisine: American
Nutrition
- Serving Size: 1 slice
- Calories: 120
- Sugar: 0.5g
- Sodium: 200mg
- Fat: 0.5g
- Saturated Fat: 0.1g
- Unsaturated Fat: 0.3g
- Trans Fat: 0g
- Carbohydrates: 25g
- Fiber: 1g
- Protein: 4g
- Cholesterol: 0mg